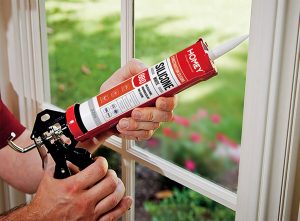
How to Clean Silicone Sealant: The Ultimate Guide
Silicone sealant is a go-to material for waterproofing in kitchens, bathrooms, and outdoor areas. Over time, however, it can collect dirt, mildew, and stains, which can ruin its appearance and potentially its effectiveness. Cleaning silicone sealant isn’t difficult, but it does require some know-how to do it properly without damaging it. This guide will walk you through the steps to make your silicone sealant look as good as new!
What You’ll Need to Clean Silicone Sealant
To get started, gather the following materials:
- Mild dish soap or vinegar solution
- Soft cloth or sponge
- Scrub brush with soft bristles
- White vinegar or rubbing alcohol (for tougher stains)
- Plastic scraper or an old toothbrush
- Protective gloves
- Mask (if using strong cleaning solutions)
Safety Tip: Always wear gloves to protect your hands and, if using any strong chemicals, ensure the room is well-ventilated to avoid inhaling fumes.
Step-by-Step Guide to Cleaning Silicone Sealant
Step 1: Preparing the Area
Before you start cleaning, remove any loose dirt or dust around the silicone sealant. This will make it easier to clean effectively and prevent scratching the surface.
- Wipe down the area with a dry cloth to remove loose debris.
- Protect surrounding surfaces with a towel or plastic sheeting if you’re using stronger cleaners.
Step 2: Choosing the Right Cleaner
Choosing the right cleaner depends on the level of dirt and mildew present on the silicone. Mild dish soap and water work well for regular cleaning, while vinegar or rubbing alcohol can tackle stubborn stains and mildew.
- For Light Cleaning: Use a mixture of warm water and dish soap.
- For Tough Stains and Mildew: White vinegar or a small amount of rubbing alcohol can be highly effective.
Note: Avoid using harsh chemicals, as they may degrade the silicone over time.
Step 3: Applying the Cleaner
Apply the chosen cleaner to the sealant. Make sure to cover the entire area to break down any grime effectively.
- Dip a soft cloth or sponge in your cleaning solution and apply it to the sealant.
- Let it sit for a few minutes to allow the cleaner to loosen dirt and grime.
Step 4: Scrubbing and Removing Stains
For mild stains, a soft cloth should be enough. For more stubborn spots, use a plastic scraper or an old toothbrush.
- Gently scrub the area in small circles. Avoid metal scrapers or brushes with hard bristles, as they can damage the silicone.
- For mildew spots, you may need to scrub a bit harder or reapply your cleaner.
Step 5: Rinsing and Drying the Area
Once you’re satisfied with the cleaning, it’s essential to rinse the area to remove any cleaner residue.
- Rinse the sealant with warm water, wiping away any remaining cleaner.
- Dry the area thoroughly with a soft towel to prevent moisture buildup, which can lead to mildew growth.
How to Clean Different Types of Silicone Sealant
Silicone sealant is used in a range of applications, each with its own unique cleaning requirements.
Bathroom and Kitchen Sealant
Due to constant exposure to moisture, bathroom and kitchen sealant can develop mildew. Regular cleaning with vinegar or rubbing alcohol helps prevent mildew buildup.
Outdoor and Industrial Sealant
Outdoor silicone sealants can accumulate dirt and algae. A vinegar solution works well, but consider adding a mild bleach solution if dealing with algae. Always test a small area first to avoid discoloration.
Tips for Keeping Silicone Sealant Clean
To keep your silicone looking fresh:
- Clean regularly – Wipe down sealant every few weeks.
- Ventilate – In bathrooms, ensure proper ventilation to reduce mildew.
- Use mild cleaners – Avoid abrasive materials and harsh chemicals.
Mistakes to Avoid When Cleaning Silicone Sealant
Some common errors when cleaning silicone can damage it or make it less effective. Avoid these mistakes:
- Using Harsh Chemicals – Bleach or ammonia can discolor or degrade silicone.
- Scraping Too Hard – Hard scraping can scratch or tear the silicone.
- Skipping Rinsing – Leaving cleaner residue can attract more dirt and lead to mildew.
Conclusion
Cleaning silicone sealant doesn’t have to be a daunting task. By following these simple steps and regularly maintaining your silicone sealant, you can keep it looking clean and fresh while preserving its longevity. Just remember: gentle cleaners, regular upkeep, and avoiding harsh chemicals are key to preserving silicone’s quality.
FAQs
How often should silicone sealant be cleaned?
For best results, clean every 1-2 months to prevent dirt and mildew buildup.
Can bleach be used on silicone sealant?
Bleach isn’t recommended, as it may discolor and weaken the silicone over time.
What’s the best way to prevent mildew on silicone?
Regular cleaning and ensuring proper ventilation can significantly reduce mildew growth.
How do I remove old silicone sealant?
Use a plastic scraper and a silicone remover tool for safe and effective removal.
Is silicone sealant waterproof?
Yes, silicone sealant is waterproof, which is why it’s commonly used in bathrooms, kitchens, and outdoor areas.