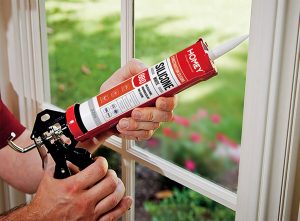
1. Gather the Necessary Supplies
Before starting, ensure you have the right tools and cleaning products:
- Protective gloves and mask
- Scraper or utility knife
- Bleach or mould cleaner
- Soft brush or toothbrush
- Silicone sealant remover (optional)
- New sealant and a caulking gun
2. Prepare the Area
- Ventilate: Open windows or use a fan to ensure proper ventilation.
- Protect Surroundings: Lay down a plastic sheet or tape around the work area to protect adjacent surfaces.
3. Remove the Old Sealant
- Use a scraper or utility knife to carefully remove the old sealant.
- If the sealant is tough, apply a silicone sealant remover and let it sit as per the instructions.
4. Treat the Mould
- Mix a solution of 1 part bleach to 3 parts water, or use a commercial mould cleaner.
- Apply the solution to the affected area using a soft brush or cloth.
- Scrub gently to remove mould and stains.
- Let the solution sit for 10-15 minutes to kill mould spores.
5. Rinse and Dry
- Wipe the treated area with a clean, damp cloth to remove any residue.
- Allow the surface to dry completely before applying new sealant.
6. Reapply Sealant
- Ensure the surface is clean and dry.
- Apply new sealant evenly using a caulking gun.
- Smooth the sealant with a wet finger or a sealing tool for a neat finish.
7. Prevention Tips
- Maintain Ventilation: Use exhaust fans or keep windows open in damp areas.
- Regular Cleaning: Clean sealant regularly with a mild detergent to prevent mould buildup.
- Anti-Mould Sealant: Consider using mould-resistant sealants for better long-term protection.